فیلترهای Intent
تا اینجا دیدید که چطور با استفاده از Intent یک اکتیویتی را از یک برنامه ی دیگر فراخوانی کردیم. سیستم عامل اندروید با استفاده از فیلترهای Intent می تواند مجموعه ای از اکتیویتی ها، سرویس ها و گیرنده های اعلام را مشخص کند تا با کمک action، categories و data scheme ی مرتبط با یک Intent تعامل برقرار کنند. با استفاده از تگ <intent-filter> در فایل manifest می توانید لیستی از actionها، categoryها و نوع dataهایی که با هر کدام از کامپوننت های اکتیویتی، سرویس یا گیرنده ی اعلام مرتبط هستند را تعریف کنید.
برای مثال قسمتی از فایل AndroidManifest.xml برای مشخص کردن اکتیویتی com.example.My Application.CustomActivity در زیر آورده شده. که می تواند با هر دو روش ذکر شده مورد دستیابی قرار بگیرد و category و نوع data نیز در آن تعریف گردیده.
<activity android:name=".CustomActivity"
android:label="@string/app_name">
<intent-filter>
<action android:name="android.intent.action.VIEW" />
<action android:name="com.example.My Application.LAUNCH" />
<category android:name="android.intent.category.DEFAULT" />
<data android:scheme="http" />
</intent-filter>
</activity>
هنگامی که برای یک اکتیویتی مانند قطعه کد بالا فیلترهای Intent تعریف شود، اکتیویتی های دیگری که category آن ها android.intent.category.DEFAULT تعریف شده باشد، می تواندد با استفاده از android.intent.action.VIEW یا com.example.My Application.LAUNCH این اکتیویتی را فراخوانی کنند.
تگ <data> نیز نوع داده هایی را که اکتیویتی انتظار دارد آن ها را دریافت کند مشخص می کند. که در قطعه کد بالا اکتیویتی سفارشی ما انتظار دارد داده هایی که دریافت می کند با “//:http” آغاز شوند.
ممکن است در وضعیتی که ارائه ی یک از فیلترهای Intent بیش از یک اکتیویتی یا سرویس هم خوانی پیدا کند، از کاربر پرسیده شود که مایل است کارش با کامپوننت کدام برنامه که فیلترش با این Intent هم خوانی داشته انجام شود. یک استثنا نیز وجود دارد و آن زمانی است که Intent نتواند هیچ فیلتر مناسبی را پیدا کند.
در زیر لیست بررسی های انجام شده توسط اندروید، قبل از فراخوانی یک اکتیویتی آورده شده است.
- ممکن است یک تگ <intent-filter> مانند مثال بالا بیشتر از یک action را در داخل لیست خود بیاورد، اما این لیست نمی تواند خالی باشد؛ فیلترهای Intent حداقل باید یک تگ <action> را در لیست خود داشته باشد، در غیر این صورت تمام Intent های دیگر را نیز مسدود خواهد کرد. اگر بیش از یک action در لیست داخل <intent-filter> ذکر شود، سیستم اندروید قبل از فراخوانی اکتیویتی برای مطابقت دادن یکی از آن ها تلاش خواهد کرد.
- ممکن است یک تگ <intent-filter> صفر، یک یا بیشتر از یک catgory را در خود لیست کند. اگر هیچ category ذکر نشده باشد سیستم اندروید به طور پیش فرض تطابق این category را موفقیت آمیز در نظر خواهد گرفت، اما اگر بیش از یک category ذکر شده باشد، سیستم اندروید تک تک آن ها را تست کرده و باید هر category در شی Intent با یک category در فیلتر مطابقت داشته باشد.
- هر تگ <data> می تواند یک URI و یک نوع داده(MIME media type) را مشخص کند. ویژگی های مجزایی نیز شبیه scheme، host، port و path برای هر قسمت از URI وجود دارد. یک شی Intent که شامل هر دو بخش URI و نوع داده می شود، در صورتی آزمون تطابق را قبول می شود که نوع داده اش با یکی از داده های ذکر شده در فیلترهای Intent مطابقت داشته باشد.
مطلب پیشنهادی: آموزش برنامه نویسی اندروید – سرویس ها در اندروید
مثال
مثال زیر تغییر یافته ی مثال قسمت اول است. در این جا می بینیم که سیستم اندروید چگونه تعارض تطابق یک Intent با دو اکتیوی را حل می کند؛ و پس از آن چطور یک اکتیویتی سفارشی را با یک از فیلترهای Intent فراخوانی می کند و در نهایت به سراغ مورد استثنا می رویم، هنگامی که هیچ اکتیوتی مناسبی برای Intent تعریف نشده باشد.
| مرحله | توضیحات |
| ۱ | با استفاده از android studio یک برنامه اندروید ایجاد کنید و به عنوان My Application تحت بسته com.example.tutorialspoint7.myapplication نام گذاری کنید. |
| ۲ | فایل src/com.example.android.filters/MainActivity.java را با افزودن سه دکمه برای گیرنده تغییر دهید. |
| ۳ | فایل جدید src/Main/Java/CustomActivity.java را اضافه کنید تا یک اکتیویتی سفارشی داشته باشد که توسط intents مختلف مورد استفاده قرار می گیرد. |
| ۴ | XML فایل res/layout/activity_main.xml برای اضافه کردن سه دکمه در طرح خطی تغییر دهید. |
| ۵ | فایل لایه ای res/layout/custom_view.xml را با یک <TextView> ایجاد کنید که نشان دهنده ی اطلاعات ارسال شده از طریق intent خواهد بود. |
| ۶ | محتوای فایل AndroidManifest.xml را با افزودن تگ <intent-filter> که معرف intent شما در اجرای اکتیویتی سفارشی است، تغییر دهید. |
| ۷ | نرم افزار را با استفاده از شبیه ساز سیستم اندروید اجرا و نتیجه را بررسی نمایید. |
در زیر محتوای تغییر یافته فایل src/MainActivity.java قرار دارد.
package com.example.tutorialspoint7.myapplication;
import android.content.Intent;
import android.net.Uri;
import android.support.v7.app.AppCompatActivity;
import android.os.Bundle;
import android.view.View;
import android.widget.Button;
public class MainActivity extends AppCompatActivity {
Button b1,b2,b3;
@Override
protected void onCreate(Bundle savedInstanceState) {
super.onCreate(savedInstanceState);
setContentView(R.layout.activity_main);
b1=(Button)findViewById(R.id.button);
b1.setOnClickListener(new View.OnClickListener() {
@Override
public void onClick(View v) {
Intent i = new Intent(android.content.Intent.ACTION_VIEW,
Uri.parse("http://www.example.com"));
startActivity(i);
}
});
b2 = (Button)findViewById(R.id.button2);
b2.setOnClickListener(new View.OnClickListener() {
@Override
public void onClick(View v) {
Intent i = new Intent("com.example.
tutorialspoint7.myapplication.
LAUNCH",Uri.parse("http://www.example.com"));
startActivity(i);
}
});
b3 = (Button)findViewById(R.id.button3);
b3.setOnClickListener(new View.OnClickListener() {
@Override
public void onClick(View v) {
Intent i = new Intent("com.example.
My Application.LAUNCH",
Uri.parse("https://www.example.com"));
startActivity(i);
}
});
}
}
در زیر محتوای تغییر یافته فایل src/com.example.My Application/CustomActivity.java قرار دارد.
package com.example.tutorialspoint7.myapplication;
import android.app.Activity;
import android.net.Uri;
import android.os.Bundle;
import android.widget.TextView;
/**
* Created by TutorialsPoint7 on 8/23/2016.
*/
public class CustomActivity extends Activity {
@Override
public void onCreate(Bundle savedInstanceState) {
super.onCreate(savedInstanceState);
setContentView(R.layout.custom_view);
TextView label = (TextView) findViewById(R.id.show_data);
Uri url = getIntent().getData();
label.setText(url.toString());
}
}
در ادامه محتوای فایل res/layout/activity_main.xml قرار دارد.
<?xml version="1.0" encoding="utf-8"?>
<RelativeLayout
xmlns:android="http://schemas.android.com/apk/res/android"
xmlns:tools="http://schemas.android.com/tools"
android:layout_width="match_parent"
android:layout_height="match_parent"
android:paddingBottom="@dimen/activity_vertical_margin"
android:paddingLeft="@dimen/activity_horizontal_margin"
android:paddingRight="@dimen/activity_horizontal_margin"
android:paddingTop="@dimen/activity_vertical_margin"
tools:context="com.example.tutorialspoint7.myapplication.MainActivity">
<TextView
android:id="@+id/textView1"
android:layout_width="wrap_content"
android:layout_height="wrap_content"
android:text="Intent Example"
android:layout_alignParentTop="true"
android:layout_centerHorizontal="true"
android:textSize="30dp" />
<TextView
android:id="@+id/textView2"
android:layout_width="wrap_content"
android:layout_height="wrap_content"
android:text="Tutorials point"
android:textColor="#ff87ff09"
android:textSize="30dp"
android:layout_below="@+id/textView1"
android:layout_centerHorizontal="true" />
<ImageButton
android:layout_width="wrap_content"
android:layout_height="wrap_content"
android:id="@+id/imageButton"
android:src="@drawable/abc"
android:layout_below="@+id/textView2"
android:layout_centerHorizontal="true" />
<EditText
android:layout_width="wrap_content"
android:layout_height="wrap_content"
android:id="@+id/editText"
android:layout_below="@+id/imageButton"
android:layout_alignRight="@+id/imageButton"
android:layout_alignEnd="@+id/imageButton" />
<Button
android:layout_width="wrap_content"
android:layout_height="wrap_content"
android:text="Start Browser"
android:id="@+id/button"
android:layout_alignTop="@+id/editText"
android:layout_alignLeft="@+id/imageButton"
android:layout_alignStart="@+id/imageButton"
android:layout_alignEnd="@+id/imageButton" />
<Button
android:layout_width="wrap_content"
android:layout_height="wrap_content"
android:text="Start browsing with launch action"
android:id="@+id/button2"
android:layout_below="@+id/button"
android:layout_alignLeft="@+id/button"
android:layout_alignStart="@+id/button"
android:layout_alignEnd="@+id/button" />
<Button
android:layout_width="wrap_content"
android:layout_height="wrap_content"
android:text="Exceptional condition"
android:id="@+id/button3"
android:layout_below="@+id/button2"
android:layout_alignLeft="@+id/button2"
android:layout_alignStart="@+id/button2"
android:layout_toStartOf="@+id/editText"
android:layout_alignParentEnd="true" />
</RelativeLayout>
در ادامه محتویات فایل res/layout/custom_view.xml قرار دارد.
<?xml version="1.0" encoding="utf-8"?>
<LinearLayout xmlns:android="http://schemas.android.com/apk/res/android"
android:orientation="vertical" android:layout_width="match_parent"
android:layout_height="match_parent">
<TextView android:id="@+id/show_data"
android:layout_width="fill_parent"
android:layout_height="400dp"/>
</LinearLayout>
و در زیر محتوای فایل res/values/strings.xml برای تعریف دو ثابت جدید قرار دارد.
<?xml version="1.0" encoding="utf-8"?>
<resources>
<string name="app_name">My Application</string>
</resources>
در زیر محتوای پیش فرض فایل AndroidManifest.xml قرار دارد.
<?xml version="1.0" encoding="utf-8"?>
<manifest xmlns:android="http://schemas.android.com/apk/res/android"
package="com.example.tutorialspoint7.myapplication">
<application
android:allowBackup = "true"
android:icon = "@mipmap/ic_launcher"
android:label = "@string/app_name"
android:supportsRtl = "true"
android:theme = "@style/AppTheme">
<activity android:name = ".MainActivity">
<intent-filter>
<action android:name = "android.intent.action.MAIN" />
<category android:name = "android.intent.category.LAUNCHER" />
</intent-filter>
</activity>
<activity android:name="com.example.tutorialspoint7.myapplication.CustomActivity">
<intent-filter>
<action android:name = "android.intent.action.VIEW" />
<action android:name = "com.example.tutorialspoint7.myapplication.LAUNCH" />
<category android:name = "android.intent.category.DEFAULT" />
<data android:scheme = "http" />
</intent-filter>
</activity>
</application>
</manifest>
الان برنامه My Application را اجرا کنید. فرض میکنم AVD را در حین انجام تنظیمات محیط ایجاد کرده اید. برای اجرای برنامه از Android Studio، یکی از فایل های اکتیویتی پروژه خود را باز کنید و روی آیکون اجرا در نوار ابزار کلیک کنید. Android Studio این برنامه را در AVD خود نصب می کند و آن را اجرا می کند و اگر همه چیز تنظیم باشد و برنامه شما مشکلی نداشته باشد، پنجره Emulator همانند تصویر زیر است.
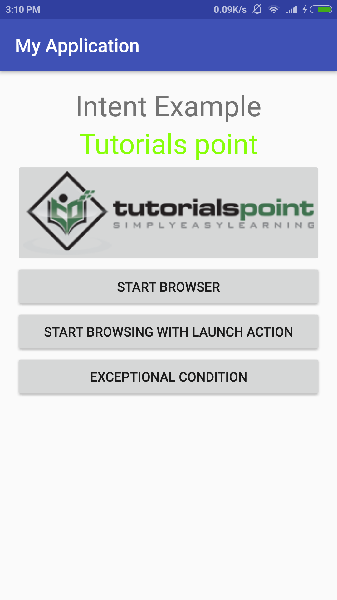
حالا با دکمه اول “Start Browser with VIEW Action” شروع می کنیم. در اینجا ما اکتیویتی سفارشی خودمان را با فیلتر “android.intent.action.VIEW” تعریف کرده ایم، اما برای “ACTION_VIEW” یک اکتیویتی دیگر نیز به صورت پیش فرض توسط سیستم اندروید تعریف شده است که باعث راه اندازی مرورگر می شود. بنابراین اندروید با استفاده از قاب زیر از ما می خواهد یک اکتیویتی را برای اجرا شدن انتخاب کنیم.
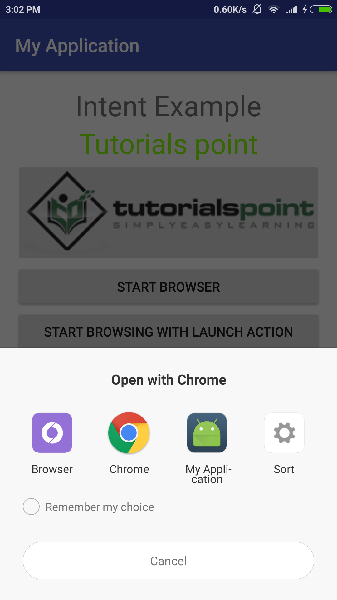
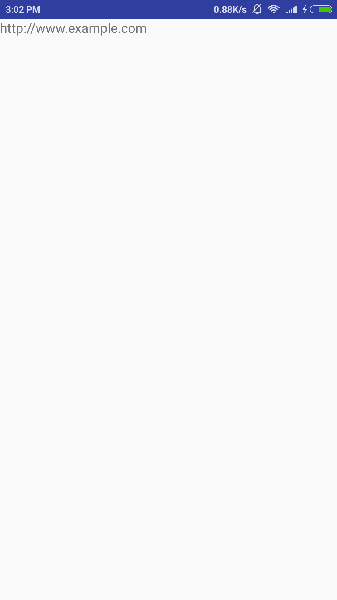
حالا اگر مرورگر را انتخاب کنید، اندروید مرورگر وب را باز خواهد کرد و وب سایت example.com را باز خواهد کرد، اما اگر گزینه IndentDemo را انتخاب کنید، اندروید CustomActivity را راه اندازی خواهد کرد که تنها داده ارسالی را دریافت و مانند تصویر زیر نمایش خواهد داد.
حال با استفاده از دکمه ی بازگشت به عقب بر می گردیم و روی دکمه ی “Start Browser with LAUNCH Action” کلیک می کنیم، در اینجا سیستم اندروید فیلتری را که برای انتخاب اکتیویتی تعریف شده است تطابق می دهد و در نتیجه اکتیویتی سفارشیِ ما راه اندازی می شود.
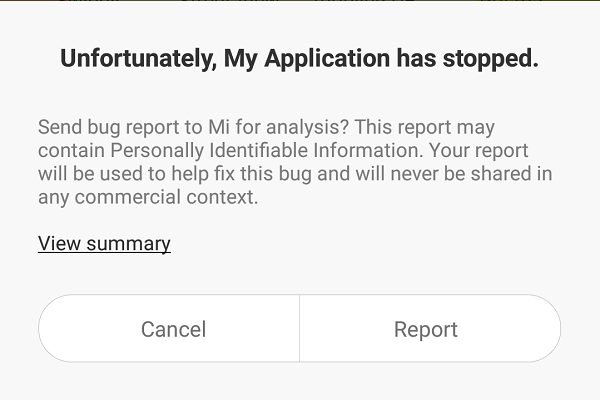
دوباره با استفاده از دکمه ی بازگشت به عقب برگردید و روی دکمه ی “Exception Condition” کلیک کنید. در اینجا سیستم اندروید سعی می کند یک فیلتر معتبر برای intent داده شده پیدا کند که موفق نمی شود؛ زیرا به جای استفاده از داده ی http از https استفاده کرده ایم؛ با این وجود اکتیویتی ما درست است، بنابراین سیستم اندروید آن را یک استثنا در نظر گرفته و پیام زیر را نمایش می دهد.
منبع: tutorialspoint


